Showing posts with label Messenger. Show all posts

Monday, July 26, 2010

Add Yahoo! Messenger Status Icon to Blogger

IM-Online! » Yahoo! Messenger's Status GeneratorNow I want to tell you how to Add Yahoo! Messenger Status Icon to your blog on Blogger.com. Just follow this simple instructions below.

If you have any questions or corrections, please feel free to commenting this simple tuts ;)

  1. Go to this cool site here.
  2. Select your favorite image by clicking the category menus.
    Choose Menu

    don't forget to click on the radio button below:
    Click Button
  3. Enter your Yahoo! ID.
    Enter Name

    please note that you don't have to write the suffix @yahoo.com / @yahoo.co.uk / @yahoo.co.id etc. Just your ID.
  4. Click SUBMIT button on the right after the input text.
  5. You will see 3 boxes appears.
    - HTML Code: to put on your blog, website or social networking
    - BB Code: to put on your forum
    - Preview: How your code will looks like
  6. Copy the code by left click on the area code, then right click to copy the code.
    Select Code

    done. Now you've got your code.

Then, I'll show you how to use the code into your Blogger account.
  1. Log in to your account in Blogger.com.
  2. Go to Design page and be sure you're under tab Page Elements.
  3. Click Add New Gadget in the location you want to put it on.
  4. It will show new window with some options. Choose HTML/Javascript by clicking it or the sign plus (+).
  5. Now in Configure HTML/Javascript window, you can enter the Title and paste the HTML code you've got from above tutorial in the Content box.
  6. Click Save.
  7. Done. Now you can visit your blog to see the result ;)
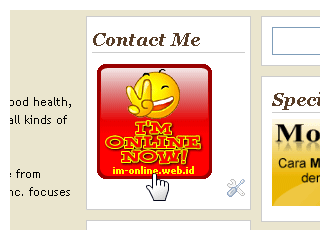
    Preview Code - Blogger
Even we can use this tool for free, but to show our thanks for their nice job we could donate them just for few bucks ;)

Related Posts:
- Memasukkan Status Yahoo! Messenger ke Blog
- IM-Online! » Yahoo! Messenger's Status Generator

Saturday, July 24, 2010

IM-Online! » Yahoo! Messenger's Status Generator

IM-Online! » Yahoo! Messenger's Status GeneratorHello friends...!

I'm sure most of us already know how to put Yahoo! Messenger Status Icons to our blog so our friends can send us message when the status shows we're online. But, now I want to tell you one of most exciting website that give us free service of generating our code so then we just copy & paste it into our blog easily.

All you need is just visit this address http://im-online.web.id/. There, they will give you a very detailed instructions. So I'm sure you won't get confuse. But, if so please tell me where's the part you don't understand. OK? ;)

You can also use the code for your forums or another social networking such as Friendster and Facebook. Please see How To Use page to know more about it. If you think they will collecting some charges for their services, you absolutely wrong. They provide it for free, no charge at all! But we can help this site keep alive by donating them for some bucks to show our respects for their nice job.

Fair enough, right? ;)

Please see in my previous post at "Memasukkan Status Yahoo! Messenger ke Blog" if you want to read in Bahasa Indonesia

Wednesday, July 21, 2010

Memasukkan Status Yahoo! Messenger ke Blog

IM-Online! » Yahoo! Messenger's Status Generator Sekedar intermezo sedikit dari seputar dunia biologi yah... :D

Kali ini saya mau berbagi tutorial bagaimana caranya kita bisa memasukkan status Yahoo! Messenger (Y!M) ke Blog. Manfaat dari alat ini adalah kalau kita pasang status Y!M di blog kita, pengunjung blog kita jadi tahu kita sedang online/tidak di Yahoo! Messenger dan bisa langsung chat dengan kita di Y!M.

Ya udah, langsung aja ya ke tutorialnya.. dijamin cepat & gampang kok ;)
  1. Buka situs http://im-online.web.id.
  2. Pilih gambar yang diinginkan di bagian #1 Choose Your Image. Jangan lupa klik radio button di bawah gambar yang diinginkan ya...
  3. Masukkan ID Yahoo! yang ingin dipakai pada bagian #2 Submit Your Yahoo! ID.
  4. Akan muncul 3 kotak di bawah. Klik kiri kotak yang berisi HTML Code > klik Kanan > pilih menu Copy.
  5. Log in ke account Blogger.com.
  6. Klik menu Design yang ada di bawah pilihan blog kita.
  7. Setelah masuk ke halaman Design, pastikan kita berada di bagian Page Elements.
  8. Klik Add New Gadget di lokasi/bagian blog yang ingin kita taruh status Y!M itu.
  9. Setelah muncul jendela baru, pilih HTML/Javascript dengan mengklik pilihan itu atau pada tanda plus (+) di sebelah kanannya.
  10. Nah, di halaman Configure HTML/Javascript masukin Title dari addon itu, misalnya "Support" seperti yang kami gunakan di blog ini dan paste-kan kodenya di kotak Content.
  11. Klik Save. Jadi deh... ;)


Tuh kan, udah dibilang gampang :D

Kalo kamu bertanya-tanya apakah kita akan dipungut biaya dari alat ini atau tidak, maka harus lihat halaman About. Karena disana sudah dijelaskan bahwa layanan ini tidak akan memungut biaya sepeser pun alias gratis. Yah... tapi untuk menunjukkan rasa terima kasih kita, ga ada salahnya kita menyumbang sedikit rupiah/dollar demi kelangsungan situs cantik ini ;)

Oh ya, hampir lupa! Kalau script ini juga bisa ditaruh di forum ataupun jejaring sosial lain seperti Friendster/Facebook. Kamu lihat aja caranya ya di halaman How To Use...

Oke deh, sekian intermezonya hehehehe :D